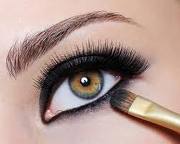
 The number one thing girls want to know how to do is a sexy smokey eye. This Is probably the look I get asked to do more than anything else. Once you can do a smokey eye you can kinda do anything. You can use this technique for any colour, shape or size eyes and with any colours you like. Step 1: PREP - If you want all your hard work to last all night, this is the most important step. Just like your foundation (see my foundation application blog post), you need to prepare you eyelid for makeup. Firstly cleanse with a non oily cleanser and rinse so there is no residue left, or you can use a fragrance free baby wipe. DO NOT use makeup wipes as they leave your lid slick and moisturized. Next apply an eyeshadow primer, my fav by far is the urban decay primer potion. I buy mine online from the states (go Ebay!). A lot of brands have eye primers now so any one will do. If you don't have one then you can foundation and powder your eyes first. Step 2: BASE COLOUR - You can do a smokey eye in any colours you like. you just need 3 or 4 different shades. The lightest shade should be close to your skin colour, this should be applied with a fluffy brush from your crease all the way up to your brow. Step 2: LINER - Using a black/dark colour pencil or gel liner or a MAC paintpot, line the top and bottom lashline, then with a firm small brush smudge the liner out so the line becomes 'smokey' (if it sets quickly do one eye at a time so you have time to smudge it) Top the liner with the darkest shade of shadow you have chosen. How high you bring this dark colour depends on how intense you want your smokey eye to be. Don't bring it higher than your crease or you can just have it on top of the liner This doesn't have to be perfect just yet. Step 3: BLEND - Taking the medium colour eyeshadow on a crease brush or a medium sized fluffy brush place this in your crease and blend blend blend. This should soften the edge of your darkest colour and blend it nicely into your lightest colour. You can also go back with a small brush and the dark colour or a black and apply in a V shape on the outer corners, this gives your eye depth in is great for people with eyes on the smaller side. Step 4: HIGHLIGHT - This is optional but I love to go back with a highlighter in a silver, gold or pearly shade and apply on the inner corners of your eyes and very softly directly under the eyebrow. Step 5: LINE WATER LINES - This is also optional and can make your eyes look smaller but lining the inner rims of your eyes finishes and intensifies your look. You can use a pencil or gel liner for this but with a pencil make sure you take it with you so you can re apply during the night as its hard to make it last more than a couple of hours. You can go back again and line as close as you can to the lashes again to give it a bit more pop. Step 6: Last but definitely not least is MASCARA - Apply 2 or 3 coats of black mascara, Wiggle the wand from root to tip to get every last lash. My Fav at the moment is the Maybelline Colossal volume express, and at only about $22 its very affordable! Here's some pics to use as guides. Enjoy!! 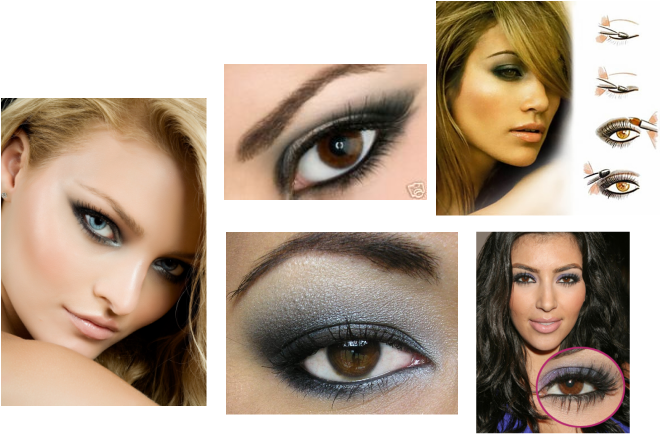
2 Comments
|
AuthorLexia Dyer makeup and hair beauty blog Archives
April 2015
Categories
All
|
 RSS Feed
Lexia Dyer makeup and hair - All rights reserved 2018